
Tips and Suggestions
by: Chris Oswald - R/C Modz Full Throttle; ORCCTM Tech.
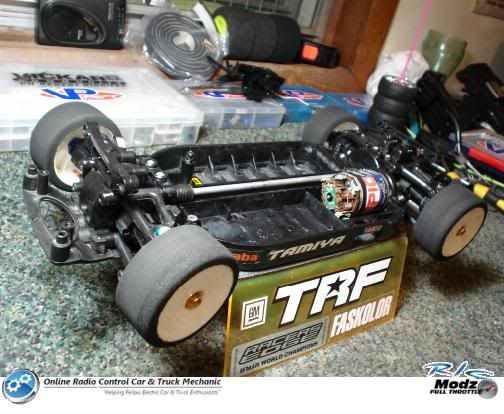
Hello ORCCTM Blog followers. You may recognize the following write up on the recently "New Project" released GM Performance Parts Corvette. Based on a very popular Tamiya TT-01. This articles tips and suggestion can be made for any vehicle, but because of an up coming indoor season around the corner I thought I would show you a few things that I consider Basic Electric R/C Vehicle Maintenance.R/C Modz Full Throttle and my ORCCTM Blog will come together for this write up for the first time. Here are some basic steps to consider when starting to rebuild and maintain your Electric R/C vehicle.
What you will need: (other than your tools)
- Instruction booklet/diagrams* ~If available~ (in case you get stuck)
- Clean rags
- Old toothbrush
- Bearing lubricant
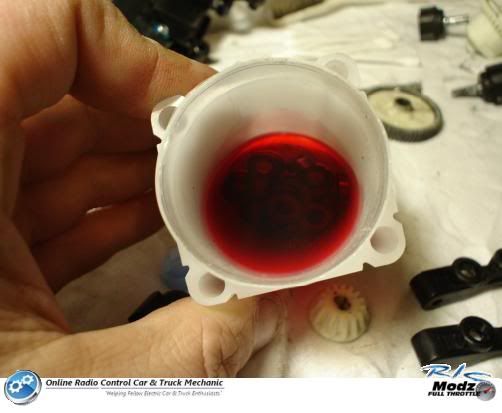
- Electric motor/ bearing cleaner
- Small clean dry plastic container
- Differential and gear grease/lube
- Shock oil (weight depends on preference; see owners manual for details)
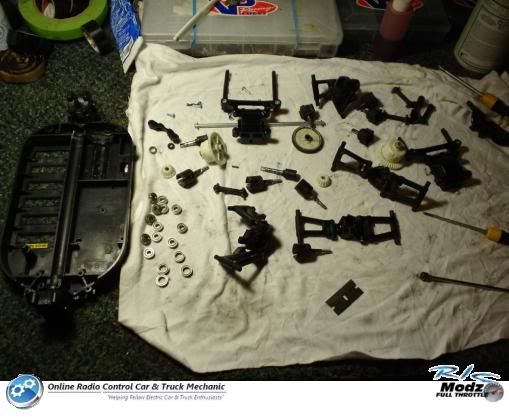
First, you want to tear down the whole vehicle. This may seem like over kill to some, but with my experience this method covers all the basis and you'd be surprised what you find sometimes once you get into a tear down. You might find a bearing that is seized. Maybe you'll come across a worn out component like a tie rod end, or maybe some extra play in a wheel bearing/bushing. I don't expect you to do this every time your car gets dirty. I do however do this myself every spring and fall. With seasons changing the terrain you drive on does too. So why not prepare your vehicle properly for whatever you want to throw at it. Besides, most indoor carpet tracks want you to have a clean sedan to drive. They would prefer you not to bring in something that had bad road rash and dust and gravel from last year all over it.
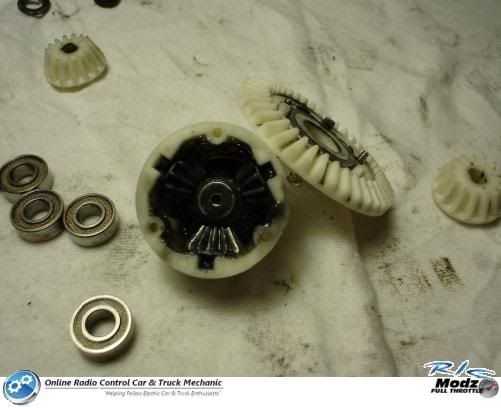
A quik look at these differential's and you can see that it's a bit dirty. It was cleaner when the differential's first went together. I had cleaned the outer ring gear and pinion, like some would stop at this point. By why not rebuild the differential's?? Your already there. Plus, you know then it's going to run nice and smooth after all that work.
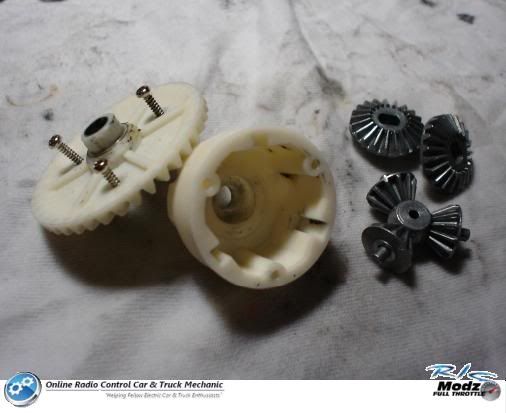
After cleaning out the differential's and the cases, I wanted to inspect them for any sign of damage or unusual wear and tear inside the differential cup. You also may want to take a good look at the internal differential gears. Make sure they are looking alright and able to be reused and not scared or have pits or chucks in the face of the gears. This has happen and is often caused by anything fine and course that you pick up on the road outside.
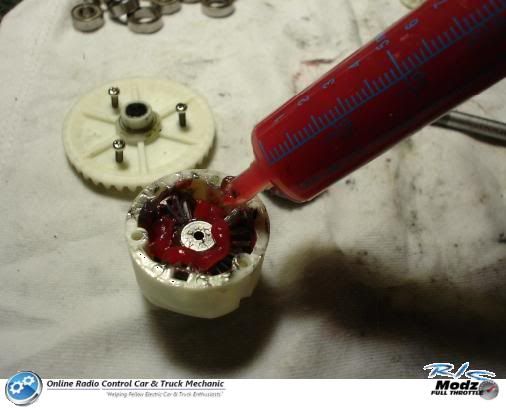
Once your satisfied with the cleaning and inspection of all internal components it's time for reassembly and some lubrication. NOTE: While I am showing a very simple drive train on a 4WD shaft driven touring car, this maintenance is also good for any gear drive train of most electric vehicles.
Now the main chassis and drive train components are clean and ready for re-assembly. I need to point out that not everyone cleans the bearings you find along the way during a rebuild. While is the hobby store seine I had met a few people that never did such a thing and just did cleaning "around" the vehicle. They said "blow it off with an air compressor and call it a day." This is good for carpet racing and light outside driving on clean surfaces. But lets face it. 90% of the vehicles I had seen first hand were not of clean surfaces. I too run in some dusty conditions sometimes, which is why these maintenance tips and ideas are good to have. After you clean the bearings with the approved bearing cleaner available at any hobby store. YOU MUST remember to re-lubricate the bearings. You don't want to have a dry bearing. Seen here, soaking the bearings in bearing lube will help to further the performance of these wonderful little upgrade that didn't come stock on this TT-01 kit, but every vehicle should have them. If you don't want to soak and like getting your hands dirty, by all means go ahead and do each bearing by hand. If you want..... :) :)
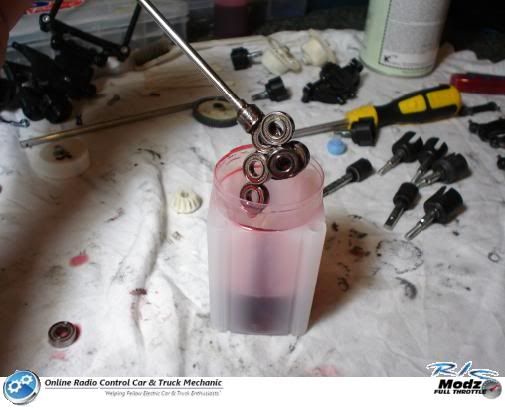
TIP: use a magnetic tool to extract the bearings from the container leaving more lubricant in the container and not all over yourself or your work table.
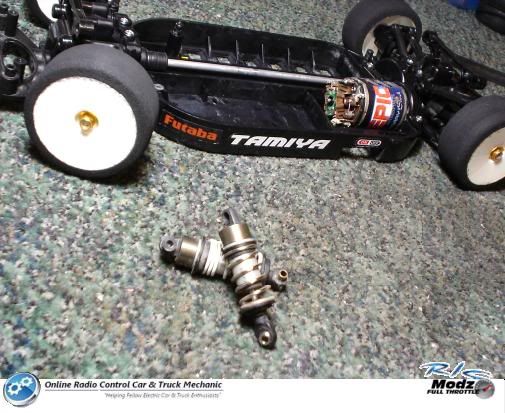
Don't forget the shocks and electric motor. These are also some over looked items as well. Make sure the shocks aren't leaking fluid or damaged in anyway. The caps are tight, they shafts are straight and not bent. If they are damaged, you might need to invest a little cash in a rebuild kit. If they check alright then at the very least check the level of the shock oil inside the shocks. If they are low or the fluid is dirty it's time to change it. Rebuild kit's very in cost depending on the manufacturer. However shock oil can usually be picked up at your LHS for under $10.00
You can also pick up electric motor cleaner. This is important because unless your running a brushless motor that requires less maintenance other than lubricating the bearings. The standard brush motor stock or not needs to be cleaned and serviced as well. If you would like more detail on motor cleaning and shock rebuilding stay tuned to the ORCCTM blog for future detailed articles. In the mean time a nice quick spray of the motor cleaner inside either end of the motor will do wonders. NOTE: don't forget to add a little bit of bearing/bushing lube to either end of the motor where the shaft rides on the bushing/bearing.
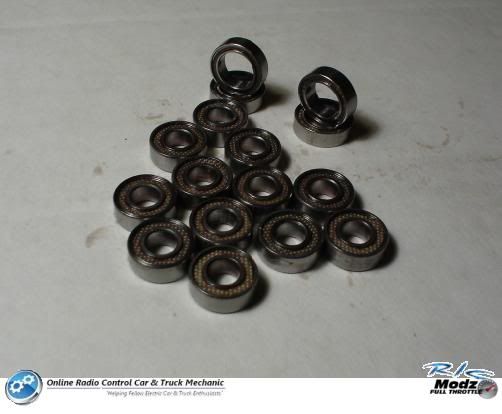
Your bearings, chassis/suspension components and other drive train components are ready for re-assembly. With everything clean and what needs to be lubricated lubed up, your next rebuild will go smoothly and the vehicle will run like new.
As the R/C vehicles get more advance and more innovative one thing will never change, Basic R/C Vehicle Maintenance. It's necessary for all R/C vehicles to last and perform for a long time. It's becoming even more necessary lately with the higher demand of speed and durability that we come to expect from the latest R/C vehicles out there. While this is a personal preference Basic R/C Vehicle Maintenance guide, it does work for myself and the others that I have helped in the past. I see no need to make it too complicated for some so they never touch or repair their own r/c. I like how hobby stores offer "R/C Vehicle Repair" and some do "Cleanings" But from a personal stand point the main reason for getting into the hobby is to experience the entire responsibility of owning a higher grade R/C vehicle. I like tinkering and modify things to make them better, faster and more exciting in some cases. I know there is others like me out there. While we go full speed into the "Ready-To-Run" phenomenon that the industry has created. I often met some people at the hobby store that when they bought an RTR vehicle they didn't put the truck together. Now some manufactures have great instructions, others don't. How will this individual know how to repair the car/truck they just bought and then broke? You could pay the hobby store to fix it... that's an option, But I say get in there, take it apart and do the basic maintenance yourself. The only way your going to know if something went wrong and what to do about it is if you try it yourself.
-Christopher Oswald
[R/C Modz Full Throttle]
[ORCCTM Tech.]
No comments:
Post a Comment